Roles can be assigned to a user on the People tab. You can allocate roles to a user when their username and password has been verified.
To manage roles for users, you can:
-
Search for and select the required user. See Find Users for more information.
The People tab is displayed by default on selecting a user.

-
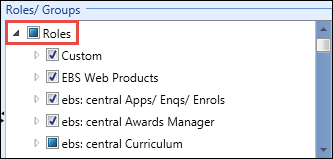
Expand the Roles tree structure in the Roles/Groups pane.

-
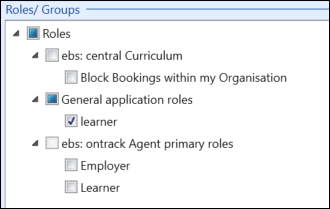
Select or deselect the check boxes to assign roles to users as follows:
-
A selected check box indicates that the role is allocated to the user. Where a selected check box has sub-roles, this indicates that all the sub-roles are selected.

-
A deselected check box indicates that the role is not allocated to the user. Where a deselected check box has sub-roles, this indicates that all the sub-roles are deselected.

-
A filled in check box indicates that the check box has sub-roles which are a mixture of selected and deselected.

Refer to the Roles Dictionary for information on the functionality of different roles.
Users who are non-staff members (that is: those who do not have a staff code) can only be allocated a limited number of roles.

-
-
Click Save.
The roles are assigned to the selected user.
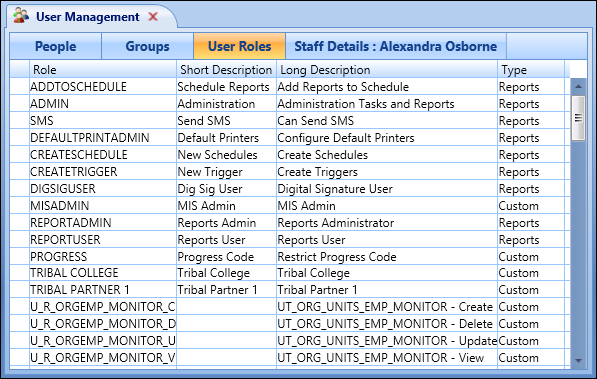
If the standard roles available do not restrict permissions and functionality of modules sufficiently for use at the institution, then the user management module offers the flexibility to create bespoke custom and reports roles under the User Roles tab.

Custom roles can be associated with progress codes using the Progress Codes reference data and are created for published users tables that have been added. These custom roles are then assigned to users as required from the Custom group on the People tab.
You can create and maintain user tables in the screen manager module which are used in the Custom Logs functionality.

Reports roles are associated with individual reports in reports and are then assigned to users as required from the Reporting group on the People tab.

To add a user role:
-
Click the User Roles tab.

The User Roles tab is displayed.

-
Click the Add button on the Admin Commands ribbon.

A new row is added to the grid.

- Enter the required details for the user role.
The fields on the User Roles tab are described in the following table.
| This field | Holds this information... |
|---|---|
| Role | The code for the user role. |
| Short Description | The short description of the user role. |
| Long Description |
The long description of the user role. This description is used for the role name when assigning user roles on the People tab. |
| Type | The type of user role. Select Custom or Reports. |
-
Click Save.
The user role is added and will be available to select to assign to users from the Custom or Reporting groups on the People tab.
When a role has been assigned to a user or group, it cannot be edited or deleted.
To edit a user role:
-
Click the User Roles tab.

The User Roles tab is displayed.

-
Double-click the field of the user role you want to update to make it editable.

If you try to edit a user role that has been assigned to a user or group, the following message is displayed and you are prevented from updating it.

- Make the required changes to the user role details.
-
Click Save.
The user role details are updated.
To delete a user role:
-
Click the User Roles tab.

The User Roles tab is displayed.

-
Select the user role that you want to remove in the grid.

-
Click the Delete button on the Admin Commands ribbon.

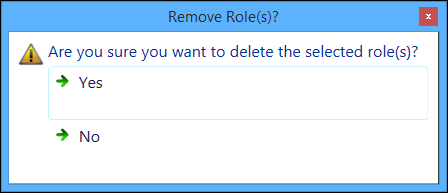
The following message is displayed.

-
Click Yes.
The user role is deleted.
If you try to delete a user role that has been assigned to a user or group, the following message is displayed and you are prevented from deleting it.
